
How to Tell If Wood Is Dry Enough for Turning
- David Condon

- May 1
- 11 min read
When I first started out, this was one of the things I worried about the most.
Cutting wood is one thing, but knowing when it’s properly dry and ready to turn is another. I rushed it more than once in the early days and paid the price, cracked pieces, distortion, and in some cases wood that looked dry on the outside but was still wet inside.
I was terrified of subsequent movement after finish turning of the first twenty or so bowls. The larger they were, the more chance they could move slightly.
Over time, I’ve learned that there isn’t just one way to tell. It’s a combination of methods, experience, and understanding how wood behaves and most importantly, allowing enough time for the wood to actually be dry.

In the image here, I am testing for moisture content in one position. In the early days, I would do this in several positions on the same bowl to get an average read.
If you’ve ever had a bowl crack after turning, it nearly always comes back to residual moisture and uneven drying. I’ve gone into that in more detail here: Wood Moisture & Why Bowls Crack as They Dry.
Where Drying Really Starts
A lot of this really starts at the log stage. How you cut and store timber early on has a big impact on how it dries later.
If a log is left sitting too long, or not sealed properly, it can start cracking before you ever get it near the lathe. On the other hand, if it’s cut and stored correctly from the beginning, you’re already giving yourself a much better chance of ending up with stable, usable wood.
Even something as simple as how quickly you process it, or whether the ends are protected, can make a big difference to how evenly it dries.
I’ve covered that step by step here: How to Process Logs for Woodturning (Without Cracking or Wasting Wood).
The Biggest Mistake – Rushing the Process
One of the easiest mistakes to make is assuming the wood is dry because it looks or feels dry.
Wood dries from the inside out. If you move it too quickly from one stage to another, you can end up with case-hardened wood, dry on the outside, but still wet in the core and the moisture locked in place.
That’s when problems show up later, especially when you’re finishing a piece and it suddenly starts to move. Or worse still, it's in a customer's house and it starts rocking on their table.
The key is to slow everything down and let the moisture equalise properly.
The real tip is when you think it is dry, place it on shelves in a stable temperature room for a few more weeks.
There’s always a temptation to try and speed this part up, especially when you’re waiting on a piece to finish drying. I’ve tested a few approaches over time and wrote about it here: Can You Really Dry Hardwood Fast? Here’s the Truth.
Using a Moisture Meter (And Its Limits)
I’ve used all sorts of moisture meters over the years, from cheap two-prong versions to more expensive pinless meters.
To be honest, they’re only ever a rough guide.
Push the pins in a millimeter or two deeper and you’ll often get a different reading. Move a few inches along the same piece and you can see another variation again.
These days, I still use a moisture meter, but only as a general indicator when drying green wood. I’ll test a few spots at random just to get a sense of where things are.
If I’m seeing readings around 10% or lower, that’s usually a good sign the wood is ready to move into a warmer environment to finish drying and reach equilibrium.
It’s not an exact science, more of an art form over time.
Tip: Pin meters only measure the area between the probes. If the surface is dry but there’s still moisture deeper inside, you can get a low or even zero reading. Push the pins in further and the reading will often climb. Use that difference to get a better feel for what’s really going on inside the wood.
Other Ways to Tell (And Their Drawbacks)
These days, I do all three of these almost subconsciously. With experience, you develop a feel for the right time that’s very hard to explain to someone starting out.
If I have any doubt at all at this stage, the wood goes back on the shelves for another while.
Here’s how each method works, and where they fall short:
Weighing the Wood
You can weigh blanks every few weeks and write the weight directly onto the wood. Once the weight stops changing, it’s likely dry.
In theory it works, but in practice I’ve found it to be a lot of effort and not always accurate enough to rely on.
Watching for Movement
Wood will often distort slightly as it dries.
That can be a useful sign, but again, it’s not precise enough on its own. Some pieces move very little, others move a lot, and that variation makes it hard to judge consistently.
Feel and Weight
Over time, you’ll start to recognise dry wood just by handling it.
Wet wood feels heavier, colder, and slightly damp to the touch. Dry wood feels lighter and more stable.
The downside is that this only comes with experience, so it’s not much help when you’re starting out.

It’s hard to see clearly in this elm bowl, but the foot is no longer perfectly round on this twice-turned piece. Some bowls go very obviously oval, others hardly move at all. How much moisture was in the wood when it was first turned has a big influence on how much movement you’ll get.
In this case, the vertical measurement is much the same as when it was green turned, but the sideways measurement has shrunk slightly.

Note: Ideally, the longer measurement 110mm would be taken parallel to the grain, with the shorter 103mm taken at 90 degrees to it. This was just a quick show-and-tell example, but the movement is still clearly visible.
This is why most of us leave a wall thickness of around 10% of the diameter when rough turning. It gives you enough material to true the bowl up properly once it has finished drying.
What Happens If You Get It Wrong?
Turning dried wood too soon can cause problems that don’t always show up straight away.
You might find:
● Warping after the piece is finished
● Cracks appearing days or weeks later
● Lids no longer fitting properly
● Sanding and finish becoming inconsistent
These issues are frustrating because the work might look fine at first, only to change later.
In most cases, it comes back to moisture still moving inside the wood.
Understanding Equilibrium (Why It Matters)
Wood doesn’t stop moving completely, it simply reaches equilibrium with its environment.
This means the moisture content in the wood matches the relative humidity of the space it’s in, whether that’s your shed, workshop or house.
For example, bringing wood from a cold shed straight into a warm house can cause problems. The outer surface adjusts quickly, while the core lags behind, leading to internal stress.
That’s why I move wood through different drying stages and allow it to settle gradually.
Reaching equilibrium is especially important for bowls. If the wood hasn’t fully stabilised, it can still move after finishing, and that’s when you end up with bowls that rock on a table or develop a slightly distorted rim.
My Practical Approach (What Actually Works for Me)
At this stage, I rely on a combination of:
Time
Controlled drying
Occasional moisture meter checks
For spindle blanks, my approach is straightforward.
I dry them in my shed setup for a few months, then move them into a second, more stable environment for further drying. For 2–3 inch spindle blanks, this works well.
If you want to see that full process in detail, I’ve covered it here:👉 Drying Spindle Blanks on a Budget – Shed Setup & Airflow Tips
Spindle vs Bowl Drying – Key Differences
Spindle blanks are generally easier and quicker to dry, with fewer losses than bowls.
Bowl blanks or rough turned bowls are a different story altogether.
They are thicker, hold more moisture and are far more likely to move as they dry. That’s why they need more time and more control, especially after rough turning.
Bowl blanks are mostly twice turned bowls meaning they are rough turned while green, seal and dried and then finish turned. Some are dried in plank form and then cut into circles and turned. This is generally done for 3 inch material and under.
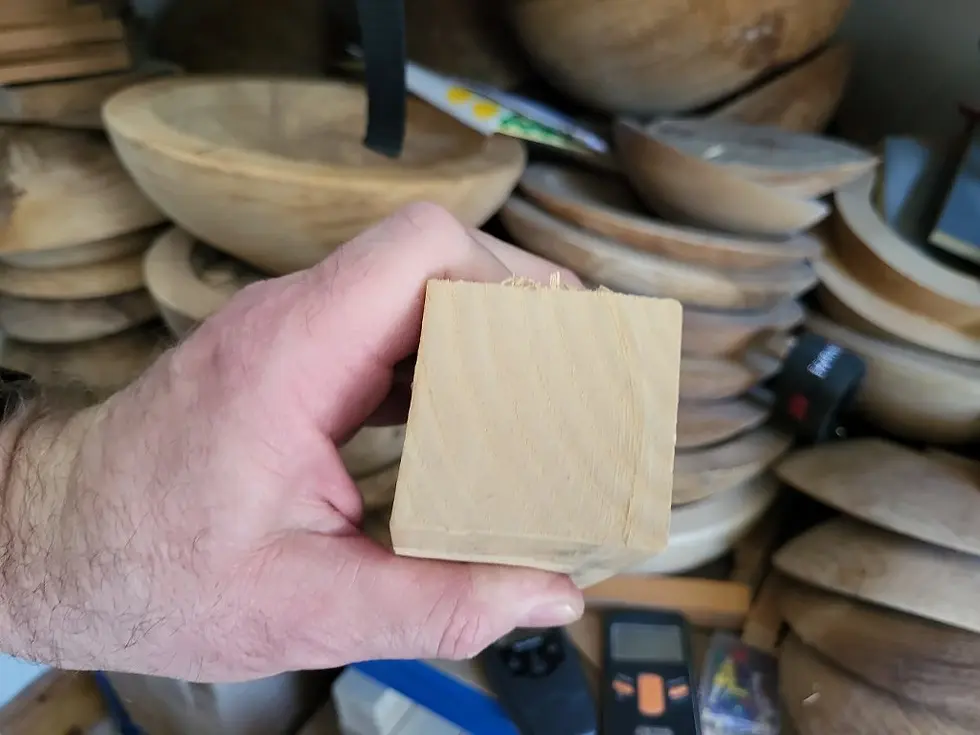
This blank started out square, but as it dried it shifted slightly into a kind of parallelogram shape. It’s subtle, but it’s a good sign the wood has been drying well. Not all pieces will move like this, it depends on grain direction, knots, and other irregularities in the wood.
If you want to check how a batch is progressing, take a blank off the shelves and test it. The next step is to cut it down into a rough blank for whatever project you have in mind, then confirm the moisture content with a meter in the end grain.
Cutting it into smaller, project-sized pieces also helps release any remaining tension in the wood and can speed up the final stage of drying if there’s still moisture inside.
Tip: I prefer spindle blanks to be reading around 10% or lower before I cut them down to rough size. If they’re still above that, there’s a greater chance they’ll continue moving after cutting, which can leave you with blanks that are no longer straight or square.

Taking readings at various points, both side grain and end grain, is helpful in the early days of woodturning to get a rough idea of how dry a blank is.
The meter here shows 8% just under the surface, which likely means the core is still slightly higher, somewhere around 8–10%.
Cutting it into smaller pieces will help any remaining trapped moisture escape. At that stage, it’s safe to cut the wood into project sizes, as long as you keep it somewhere stable, not too hot and not near areas that get damp or steamy, like kitchens or bathrooms.
Bowl Blanks – How I Judge When They’re Ready
When you rough turn a green bowl, it’s heavy, wet and unstable.
Some people use the paper bag method, weighing the piece over time until it stabilises. I use this myself (without the weighing part) and have had good results, particularly with species like ash, elm and sycamore over about six months. Beech tends to need a bit more care, and bags aren’t really suitable unless you monitor them closely and change them during the first few weeks, when the wood is at its wettest.
Personally, I wouldn’t consider a bowl dry in less than six months, and even then I keep checking.
One of the main indicators I use is movement in the foot. When the foot starts to become visibly oval, I know the drying process is almost finished. Once that movement stops, it’s a good sign the wood has stabilised.
You can measure this, but I’ve found that to be slow and a bit tedious. Instead, I’ll pick one bowl from a batch, usually the largest one with the thickest walls. When that stops moving, the rest of the batch is usually ready to come out of the bags and move to the next stage, reaching equilibrium indoors.
I’ll still use a moisture meter occasionally, just to confirm what I’m seeing.
Slowing Down the Final Stage
One of the biggest mistakes is shocking the wood with sudden temperature changes. “Shocking” is the term I use with my students to describe a sudden change in storage conditions.
Bringing wood from a cold shed, say 4°C, straight into a house at 20°C is a recipe for disaster unless you slow that transition down.
To avoid this, I stack bowls with a few stickers between them and loosely cover the pile using old marquee side panels. Over a few weeks, I gradually remove the covers, allowing the wood to adjust slowly to the warmer environment.
This helps control any final movement and reduces the risk of cracking.
Quick Checklist – Is Your Wood Ready?
If you’re unsure, this is a simple way to judge it:
● Moisture readings around 10% or lower
● No noticeable weight loss over time
● No visible movement or distortion
● Feels lighter and no longer cold or damp
● Has had time to settle in a stable environment
Even when you get these results, give it another week or two on the shelves, just to be certain. It’s far better to err on the side of caution after all your hard work.
Final Thoughts
There isn’t a single test that tells you wood is dry. It’s a combination of time, observation and experience.
Moisture meters can help, but they’re only part of the picture. The real key is understanding how wood behaves and avoiding sudden changes that create internal stress.
If you take your time and keep things controlled, the wood will tell you when it’s ready.
And once you get this stage right, everything that follows, turning, sanding and finishing, becomes far more predictable.
If you want to explore more of the basics like this, I’ve grouped my practical posts together here: Woodturning Guides & Articles.
Thanks for Reading,
David
──────────── ✿ ────────────
If you’d like to support what I do here, there’s a small “buy me a coffee” option below.
──────────── ✿ ────────────
☕ Buy Me a Coffee?
I used to run ads on my website to generate a small income, but they slowed things down and didn’t fit the feel of what I’m building here. So, I’ve removed them in favor of something simpler and more personal—a “Buy Me a Coffee” button.
If you found this post interesting, helpful, or simply enjoyable, feel free to use the link below to show your support. No pressure at all—but every little bit helps, and it’s always genuinely appreciated. As a small independent maker, I rely on a mix of teaching, crafting, and sharing to keep things going. This is just one way to help keep the shavings flying. Thanks so much!
About the Author
I’m David Condon, a woodturner and small business owner based in Tralee, Co. Kerry. I’ve been working with wood for most of my life at this stage — 11 years as a carpenter and over a decade running my own woodturning business.
Over the years, I’ve learned that woodturning is as much about patience and problem-solving as it is about tools and technique. I work mainly with Irish hardwoods, teach woodturning full-time, and spend most days learning something new in the workshop myself. On this site, I share the same practical knowledge I pass on to my students, shaped by experience, mistakes, and time spent at the lathe. If you’re interested in learning in person, I offer woodturning lessons in Tralee, with details available on my Woodturning Tuition page.
© David Condon Woodcraft – All Rights Reserved.
More Woodturning Pages to Explore
● Hampshire Sheen - Fine Finishing products that will highlight your project pieces
● Hamlet Tools - Fantastic Woodturning Tools from a well trusted brand
● Woodcraft Hub - View my woodcraft creations for inspiration of gift buying.
● Sanding Essentials - Essential sanding products for Woodturners & Woodworkers.
● Woodturning Blanks - A fine range of Hardwood Spindle Blanks & a few Bowl Blanks too!
● Woodturning Pen Blanks - A huge assortment of Acrylic & Irish Hardwood Pen Blanks.
● Crafter's Haven – A vast range of craft supplies for crafters and gift givers!
Original content © David Condon Woodcraft — Written by David Condon. Please credit and link if shared.


Comments