
Sharpening a Spindle Roughing Gouge
- David Condon

- Jan 24, 2023
- 7 min read
Updated: Mar 25
One of the first tools you’ll reach for as a woodturner is the Spindle Roughing Gouge, a tool that’s often misunderstood.
The name doesn’t help. The word “roughing” suggests it’s only for aggressive cuts, but in the right hands, at the correct presentation angle, it’s capable of producing very clean finishes on spindle work and can significantly reduce sanding time.
In this post, I’ll walk through a few simple but important tips to keep your roughing gouge in top condition. These are often overlooked by beginners and can have a big impact on how the tool performs.
Quick Guide to Sharpening a Spindle Roughing Gouge
Use a slow speed grinder where possible
Maintain a consistent bevel angle
Don’t overheat the edge
Sharpen lightly and often, not aggressively
Stop as soon as the edge is clean and even
Spindle Roughing Gouge Safety Message
For new woodturners, never use a spindle roughing gouge on a bowl or platter.
This tool is designed for cutting across the grain between centres only. Bowls and platters are a completely different orientation, and the tool is not shaped to safely make those cuts.
Using it incorrectly can result in the tool catching violently, snapping at the tang, and potentially causing serious injury.
Important to Have Sharp Tools
Sharp tools are essential for safe, controlled, and enjoyable woodturning.
A blunt tool doesn’t just make the job harder, it increases the chance of catches and poor finishes.
A good habit to get into is giving your tools a quick sharpen before you start turning. If you’re working for longer periods, a light touch-up during the session makes a big difference.
With experience, you’ll start to recognise when a tool is no longer cutting as it should.
Spend money on a decent sharpening system before you go buying extra accessories for your lathe. It will pay for itself very quickly.
I’ve seen many students try to skip this step or buy something cheap with a weak motor and poor-quality stone. It never works out well.
If you want to spend your money wisely, have a read of my post Woodturning Chisel Sets. I explain in more detail what to look for, what to avoid, and why boxed sets often lead to wasted money.
Clean the flute first.
This is often overlooked by novice Woodturners. My preferred method is a quick rub with used fine grit sandpaper which will quickly clean up any resin or debris on the inside of the flute allowing you to create a clean cutting edge at the tip of the tool.
Aesthetically, it also shines the inside of the flute too making it look like new. I normally use a small piece of used 320 grit sandpaper from my Spindle Turning pieces which will scratch the tool surface much less than fresh sandpaper.
1,000 grit or higher wet/dry sandpaper can be used too but will struggle against any kind of residue. First try the used 320 grit and then use a high grit wet/dry sandpaper if you like to create a high shine.
To finish off the tool after sharpening, I find wiping the tool with a small bit of Furniture Polish with Beeswax will clean up the entire tool, steel and wood handle inclusive. This is also beneficial if the tool has become sticky or greasy from use. I normally spray the polish onto a flat kitchen tissue, wipe all over the tool and then use the dry side to buff the polished surface.
Correct angle
Spindle Roughing Gouges are typically angled between 35-44 degrees with 35 degrees being a very aggressive cutting edge and 44 degrees being less so. The reason I sharpen to 44 degrees is simply because I got used to that angle some time ago.
I also favour a lower than normal Tool Rest height which works well with this angle. This allows me to Turn with the tool at a more comfortable lower angle with my arm in a very strong position against any kicks or catches.
For my students, this is also a much safer way to hold the tool while learning. For newbies, you can continue to follow the factory edge of the tool when sharpening although the factory will be slightly different to most sharpening jigs on the market today.
Watch the video below for sharpening tips.
Many woodturning tools can be cleaned and sharpened in a similar way, but each one has its own small differences in angles, presentation, and technique. Those details can be difficult to fully explain in writing.
If you want to get a proper feel for sharpening different tools and understand what to look for, it’s something that’s much easier to learn in person.
Sharpening A Spindle Gouge Video
I'm a stickler for sharp tools these days, the opposite of what I was when I was a Carpenter if I'm being honest.
Small projects quickly reveal how important a sharp edge really is. I mentioned this when writing about making a spinning top toy, where even a slightly dull tool can interfere with the cut and affect the finished piece.
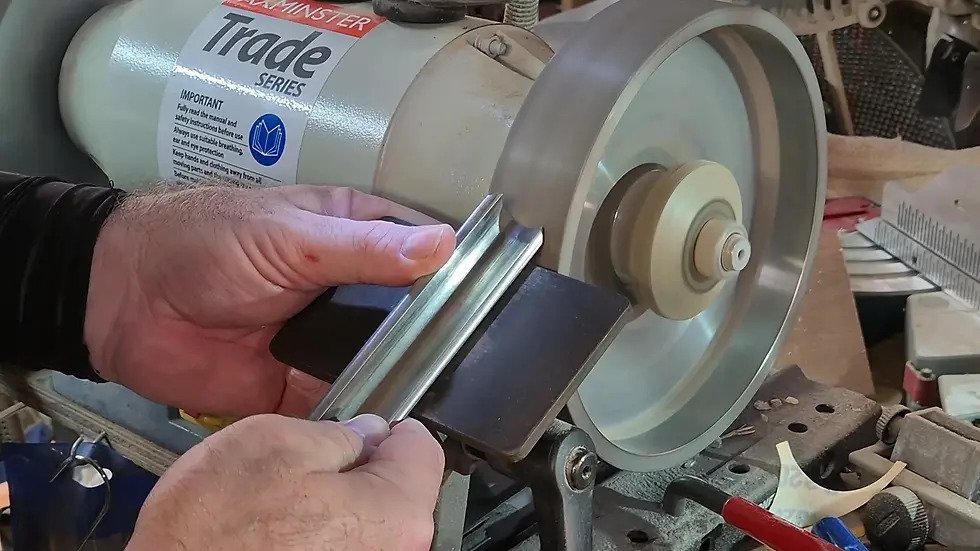
A few Points of Mention; It's hard when you don't work with a script so I probably glossed over a few things in the video above. You shouldn't remove grinder guards, especially if you are using stone wheels. Stone could conceivably shatter during operation due to manufacturing defect, transportation damage or user error during installation or during sharpening operation.
The CBN wheels shown are solid steel, with a ceramic abrasive electroplated onto the surface. They are very stable in use, but like any workshop tool, they are not completely risk-free.
In my workshop, students are not permitted to operate the grinder. I use it myself, and always wear a full face shield or suitable eye protection.
You may notice that I have removed the guards on my machine. That is a decision based on my own experience and setup, it is not a recommendation.
Your safety is your responsibility. Always follow best practices and use appropriate guarding and protection when working with any machinery.
The Sharpening Angle Jig
The Sharpening Angle Jig is very easy to make and the same principal can be used for other tools like Parting Tools, Skew Chisels and Negative Rake Tools etc.
All you need is the correct angle or angle you are comfortable with, a piece of waste wood and you can save loads of time throughout your Turning Career or hobby. Always write the tool name on the piece of wood when you are finished and add a hanging hole to keep it at your sharpening station.
When you have multiples of every tool like I have, sharpening is a dream to replicate.
Wolverine System
The Wolverine System is something you should invest in as soon as possible. It is the best platform on the market to my knowledge but I have come across cheaper homemade versions. I even bought a DIY version on eBay but eventually splashed out on the Wolverine System which turned out to be far superior.
My philosophy these days is to buy the legit brand even if you can save a few Euro by making one yourself or buying a knock-off. In the long run, it works out cheaper.
I bought a second Wolverine set so I could have a 2nd flat platform. As I own 2 grinders, the extra parts won't go to waste. The platform can actually be bought separately but became rare during Covid restrictions. You can buy the Tormek attachments quite cheaply too. Due to Brexit complications, I chose to go to Dictum in Germany to buy what I needed.
You may also be in the market for a new lathe — whether it’s your first or an upgrade — and my post Buying Your First Woodturning Lathe should help you narrow down your requirements and give you a few helpful tips to choose the right machine.
Takeaway
Look after your tools, keep them clean and sharp. Sharp tools are far safer to use and make Woodturning much more enjoyable. I wish someone had made me listen and understand that advice when I started Woodturning, it would have saved me no end of grief and I might have been much further along in skill level than I am today.
Many new woodturners struggle in the beginning without realising why. More often than not, it’s because they didn’t start off on the right footing. My post Why do Most New Woodturner's Fail? might help clear up a few things and highlight areas where you can improve or make changes.
FYI; I sell a range of Hamlet Woodturning Tools here in Ireland.
I also have a brief video on CBN wheels if you’re interested. Please help me out by watching both videos to the end — and if you can, please subscribe.
You can also browse a collection of my practical woodturning articles and workshop advice on the Woodturning Guides & Articles page.
Thank you in advance, David
Are CBN Wheels worth it? Video
About the Author
I’m David Condon, a woodturner and small business owner based in Tralee, Co. Kerry. I’ve been working with wood for most of my life at this stage — 11 years as a carpenter and over a decade running my own woodturning business.
During that time, I’ve worked with Irish hardwoods, taught woodturning, and run my workshop full-time. On this site, I share the same knowledge I pass on to my students — from choosing the right wood and tools to finishing techniques that make every project shine.
I also stock a carefully chosen range of turning blanks, tools, and craft supplies that I use every day in my own work. You can explore more of my handcrafted pieces and classes at DavidCondonWoodcraft.ie.
© David Condon Woodcraft – All Rights Reserved.
☕ Buy Me a Coffee?
I used to run ads on my website to generate a small income, but they slowed things down and didn’t fit the feel of what I’m building here. So, I’ve removed them in favor of something simpler and more personal—a “Buy Me a Coffee” button.
If you found this post interesting, helpful, or simply enjoyable, feel free to use the link below to show your support. No pressure at all—but every little bit helps, and it’s always genuinely appreciated. As a small independent maker, I rely on a mix of teaching, crafting, and sharing to keep things going. This is just one way to help keep the shavings flying. Thanks so much!
More Pages to Explore
Household Woodcraft Gifts - Discover my range of Household Woodcraft for everyday use or special occasions, each crafted with care from exquisite Irish hardwood.
New Crafter's Haven - Browse a large selection of craft supplies I also sell, including gift bags and ribbon that would accentuate my wood products when giving as a gift.
Woodturning Tuition - Learn the fantastic craft of woodturning from beginner to advanced.
Hampshire Sheen - Fine Finishing products that will highlight your project pieces.
Hamlet Tools - Fantastic Woodturning Tools from a well trusted brand


Comments