
Chestnut Buffing Tree vs Beall Buffing System
- David Condon

- Jan 23
- 7 min read
Updated: Apr 2
A Practical Woodturner’s Comparison (With Real Workshop Use)
Buffing is one of those finishing steps that can quietly transform a piece. Done well, it adds depth, clarity, and that final “professional” feel. Done badly, it can undo hours of careful turning in a split second.
I’ve been using the Beall Tool Company buffing system in my own workshop for years with excellent results, both the Individual wheels and the buffing tree version. I tend to use the buffing tree for most jobs and the wheels for big bowls.

More recently I started stocking the Chestnut Products buffing tree as a more accessible starting point for students and other woodturners getting into polishing properly.
This post pulls together two short Patreon video posts I made some time ago, expands on them with more depth, and adds real-world experience from my own workshop. It’s not meant to replace manufacturer instructions, but to help you decide which system suits you, and how to use either one safely.
Why Buffing Is Worth Learning Properly
A good buffing setup can:
Enhance clarity and depth in oil, wax, and friction finishes
Remove light handling marks and dull patches
Give consistency across batches of small items
Elevate “nice” pieces into something that feels finished
Gives a deeper shine that really sets your finish off
For small items like ring holders, ornaments, and boxes, buffing can be a game-changer and turn ordinary finished pieces into ooh-ah moments when someone picks them up.
A Quick Word on Safety
Before getting on to the tools themselves, it’s worth taking a moment to talk about safety. Buffing might look like a gentle finishing step, but it sits right at the point where fine dust, loose fibres, spinning wheels, and close hand work all come together. I’ve written before about how quickly things can go wrong in the workshop if you become complacent, particularly in my post From Dust to Disaster, which looks at how small, everyday risks can quietly stack up until something serious happens.
I’ve also covered the long-term side of things in Is Wood Dust Dangerous, where I go into why fine dust should never be ignored, even during jobs that don’t look particularly aggressive. Buffing can throw very fine particles back into the air, especially if wheels are loaded or contaminated, so good dust awareness, extraction, and personal protection matter just as much here as they do at the lathe. If you haven’t read those posts yet, they’re well worth a look before spending time at a buffing tree.
The Two Systems at a Glance
Beall Buffing System (My Long-Term Setup)
The Beall system has been around a long time and earned its reputation. It’s robust, effective, and very well suited to experienced turners who know exactly what they want from a finish.
Pros
Excellent results when used correctly
Durable wheels and proven compounds
Ideal for repeatable, high-quality finishes
Cons
More expensive
Harder to source these days
Less beginner-friendly if you’ve never buffed before
This is still the system I personally rely on day-to-day and I recommend it if you turn in production batches.
Chestnut Buffing Tree (Budget-Friendly Starting Point)
The Chestnut system offers a more accessible route into buffing without the larger upfront cost of the Beall setup.
Pros
Lower entry cost
Easier to source
A solid introduction to buffing techniques
smaller and capable of fitting entry level lathes
Cons
Not as heavy-duty as the Beall system
Smaller diameter wheels
Requires a lighter touch and a bit more patience
If you’re new to buffing, this is a sensible place to start, and one I’m comfortable recommending.
Video: Setup and Comparison (Part 1)
This first video looks at the basic setup of both systems side by side. It’s informal, and I’ll be the first to admit that once the camera switches on I forget half my vocabulary, but it shows the reality of how these systems are mounted and used in a working shop. I have also mounted in my smallest lathe for demonstration purposes.
I find a buffing tree particularly effective for:
Small bowls
Ring holders
Boxes and lidded forms
Decorative items and ornaments
The key is control, not pressure. Let the compound do the work, not brute force.
──────────── ✿ ────────────
If you’re getting value from these posts, you’ll find a “buy me a coffee” option at the end. It’s completely optional, but always appreciated.
──────────── ✿ ────────────
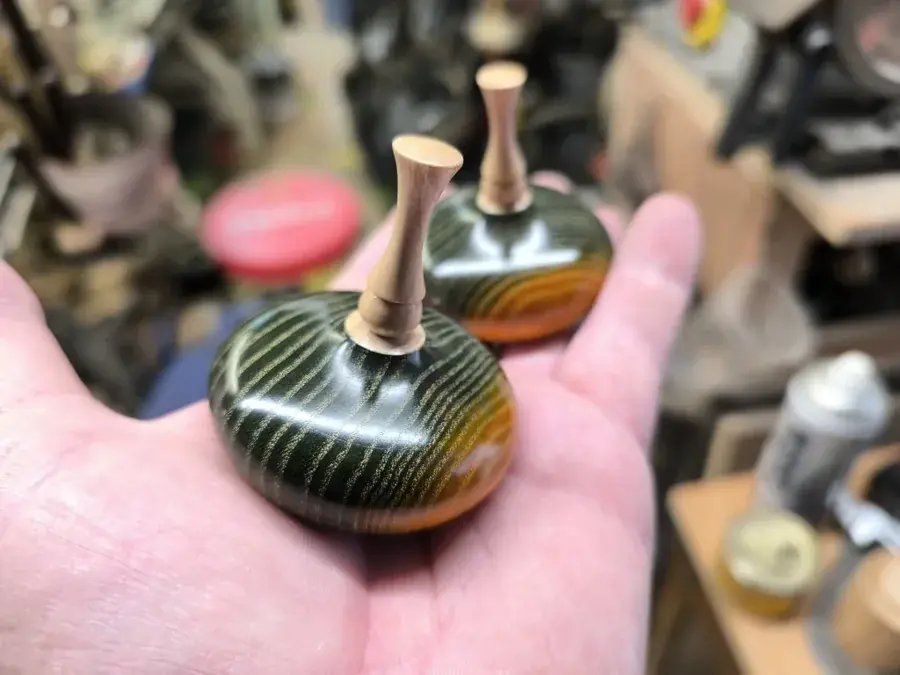
Showcasing Small Pieces – Ring Holders in Particular
This is where the buffing tree really shines for me.
My ring holders are a good example of a piece that benefits hugely from careful buffing. After sanding and finishing, the buffing tree brings out:
Cleaner curves
Better light reflection
A smoother feel in the hand
It’s a subtle upgrade, but one customers definitely notice.
What About Larger Bowls?
A full buffing tree can be used on small bowls, but once you move into larger diameters you need to be very careful.
For larger bowls, I prefer using individual buffing wheels mounted separately. This gives better control and reduces the risk of the rim catching and being pulled.
I do stock the individual wheels, and they’re a safer option if bowls are your main focus. You can find the individual wheels, various sizes and the accessory pack on my Chestnut Products page.
Safety First – How to Hold Your Work Properly
This section matters, especially if you’re new to buffing.
Buffing wheels will grab if you let them and there's nothing worse than spending an hour Turning and finishing a piece only to have it flung across the workshop and ruined. I speak from experience here.
My advice for working with any buffing system is not to do it when you are tired. Take a break and come back to it if you have even the slightest mishap or catch.
Key Safety Tips I Follow
Always buff on the lower half of the wheel, 7pm to 8pm by the clock.
Keep a firm two-handed grip whenever possible
Avoid sharp edges catching the wheel
Never buff tired or distracted
Stand slightly off-centre, not directly in line with the wheel
Your fingers will become waxed, this is normal
If a piece does catch, it won’t gently fall. It will fly around the workshop at speed.
Respect the process and take your time.
Video: Using the Systems in Practice (Part 2)
The second video looks more at actual use rather than setup. Again, it’s not a polished tutorial, but it shows the real-world handling and technique that photos alone can’t convey.
Which System Should You Choose?
If you’re starting out with buffing, the Chestnut system is a sensible, lower-risk entry point. If you are just Turning for fun, it may do you going forward without having to go for the Beall system.
If you already have experience and want a system you’ll use for years in a more mid to professional capacity, the Beall system remains excellent, if you can find one at a reasonable price.
Both systems originate abroad, which adds cost and complexity when bringing them into Ireland. That’s something worth factoring into your decision, especially if availability fluctuates.
If you want the best for your pieces, it is worth spending the money!
If you’re new to woodturning and feel you’d benefit from some hands-on guidance, I’ve written a separate post explaining exactly what to expect from your first lesson. You can read it here: What to Expect from Your First Woodturning Tuition Class.
Final Thoughts
Buffing isn’t essential, but when done properly it elevates your work to a whole other level. Whether you choose the Beall system or start with the Chestnut buffing tree, the biggest difference comes from technique, patience, and respect for the process.
I may continue to expand this post over time with more examples, finishes, and real-world use cases as they come up in the workshop.
Thanks for Reading,
David
──────────── ✿ ────────────
If you’d like to support the blog, there’s a simple “buy me a coffee” option below.
──────────── ✿ ────────────
☕ Buy Me a Coffee?
I used to run ads on my website to generate a small income, but they slowed things down and didn’t fit the feel of what I’m building here. So, I’ve removed them in favor of something simpler and more personal—a “Buy Me a Coffee” button.
If you found this post interesting, helpful, or simply enjoyable, feel free to use the link below to show your support. No pressure at all—but every little bit helps, and it’s always genuinely appreciated. As a small independent maker, I rely on a mix of teaching, crafting, and sharing to keep things going. This is just one way to help keep the shavings flying. Thanks so much!
About the Author
I’m David Condon, a woodturner and small business owner based in Tralee, Co. Kerry. I’ve been working with wood for most of my life at this stage — 11 years as a carpenter and over a decade running my own woodturning business.
Over the years, I’ve learned that woodturning is as much about patience and problem-solving as it is about tools and technique. I work mainly with Irish hardwoods, teach woodturning full-time, and spend most days learning something new in the workshop myself. On this site, I share the same practical knowledge I pass on to my students, shaped by experience, mistakes, and time spent at the lathe.
If buffing, finishing, or other woodturning questions are on your mind, you’re very welcome to join me for a tuition class in Tralee. We’ll work through things at your pace and see if we can get you properly sorted. You can find full details and current class options on my Woodturning Tuition page.
© David Condon Woodcraft – All Rights Reserved.
More Woodturning Pages to Explore
● Hampshire Sheen - Fine Finishing products that will highlight your project pieces
● Hamlet Tools - Fantastic Woodturning Tools from a well trusted brand
● Woodcraft Hub - View my woodcraft creations for inspiration of gift buying.
● Sanding Essentials - Essential sanding products for Woodturners & Woodworkers.
● Woodturning Blanks - A fine range of Hardwood Spindle Blanks & a few Bowl Blanks too!
● Woodturning Pen Blanks - A huge assortment of Acrylic & Irish Hardwood Pen Blanks.
● Crafter's Haven – A vast range of craft supplies for crafters and gift givers!
Original content © David Condon Woodcraft — Written by David Condon. Please credit and link if shared.


Comments