
Choosing the Right Parting Tools for Woodturning (Sizes Explained)
- David Condon

- May 8
- 9 min read
There’s a point in woodturning where things start to click, and then something simple like parting off a piece goes wrong.
The cut binds. The tool chatters. Or worse, the piece splits right at the end.
That’s usually when people realise not all parting tools are the same.
For something that looks so simple, the size and shape of a parting tool makes a huge difference to how cleanly and safely it works. Over the years, I’ve settled on three that I use all the time, and one extra that I like to have on hand when needed.
You don’t need a full rack of them. But choosing the right few will make your turning far more controlled and predictable. Parting tools go hand in hand with other spindle turning tools used daily in the workshop, which I have covered in more detail in my post 3 Essential Spindle Turning Tools for Beginners.
When I was starting out, I wish there had been someone to cut through all the noise and explain the basic tools in plain English. Woodturning tools can seem confusing at first, especially when every catalogue and tool set seems to offer something different. That is why I have been putting these beginner guides together. I have now covered the core tools I think most beginners should understand first, and you will find those related guides in the next section.
Building Your Core Woodturning Tool Set
If you are putting together your first proper set of woodturning tools, it helps to understand what each tool is really for before buying too much too soon.
A parting tool is a useful part of a beginner’s kit, but it should be chosen as part of a sensible setup rather than bought just because it appears in a set. I explain that wider approach in my guide to choosing beginner woodturning tools wisely.
Start With Tools You Understand
It is very easy to buy too many woodturning tools at the beginning. A large chisel set can look like good value, but if you do not yet know what each tool is for, it can add more confusion than clarity.
I think most beginners are better off learning the main tools one at a time. Once you understand the roughing gouge, spindle gouge, parting tool and skew chisel, it becomes much easier to judge what you actually need next.
I have written more about beginner tool sets here:
Quick Answer: Which Parting Tools Do You Actually Need?
If you’re just getting started, you only need 2–3 parting tools, in this order:
● A 3/16" diamond parting tool for general use and tight kerfs
● A 3/8" parting tool for heavier waste removal
● A 1/8" parting tool for fine, precise work (add this once you’re comfortable)
Anything else can come later as you figure out your own preferences.
The 3 Parting Tools I Use All the Time
These are the ones I reach for daily. Between them, they cover almost everything I need.
Hamlet 3/16" Diamond Parting Tool (HCT092)
This is the one I recommend most to beginners.

The diamond shape gives you clearance behind the cut, which helps reduce binding, especially when you’re parting deeper into a piece. It’s also narrow enough to avoid removing more material than necessary, which is useful when space is tight.
It’s a very forgiving tool to use, and once you get used to it, it becomes one of those tools you automatically reach for.
It’s also fairly straightforward to sharpen compared to some other shapes, which makes it a good starting point if you’re still getting comfortable at the grinder. Be careful moving side to side on the grinder platform as a slip can damage the tip.
You can view the HCT092 here on my Hamlet Tools page.
Hamlet 3/8" Parting and Beading Tool (HCT095)
This is your workhorse.
If I’m removing a lot of waste, especially when sizing tenons, reducing finial diameters or working down quickly, this is the tool I go for. It’s solid, stable, and removes material efficiently.
It can be used for forming beads as well, and some people do use it that way, but I’ve always tended to avoid that. I prefer using a spindle gouge for bead work, where I feel I have more control.
Where this tool really shines is in heavier work where you want something that feels planted and predictable.
You can view the HCT095 here on my Hamlet Tools page.
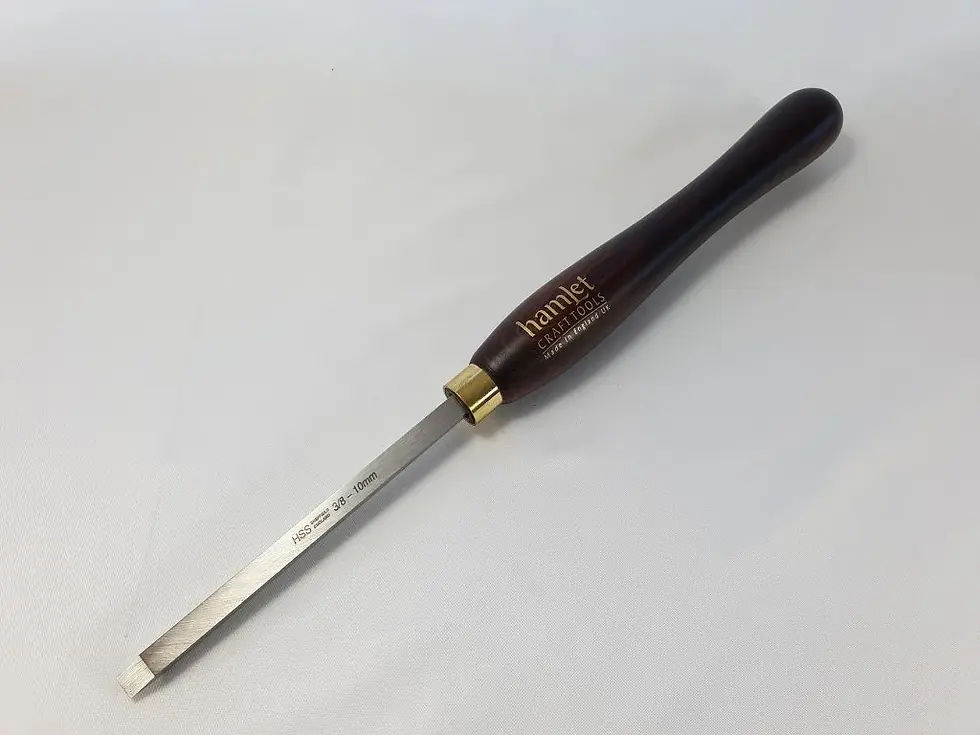
Hamlet 1/8" Parting Tool (HCT090)
This one has become a real favourite over time.

It’s light, narrow, and very easy to control. When you want a tight kerf or you’re trying to keep things precise, this is the tool that makes life easier.
It’s especially useful in box making, where you might want grain to line up cleanly between lid and base. That narrower cut helps preserve more material and keeps things looking right.
It doesn’t feel as aggressive as the larger tools, which makes it a nice option when you want to slow things down and be more deliberate with your cuts.
You can view the HCT090 here on my Hamlet Tools page.
The One You Might Add Later
You don’t need this starting out, but it’s a nice option to have once you’ve spent a bit more time at the lathe.
Hamlet 1/4" Parting Tool (HCT094)
This sits nicely between the others.

It doesn’t do anything radically different, but it gives you another option when the 1/8" feels too light and the 3/8" feels like overkill.
It’s tidy, controlled, and useful in situations where you just want that in-between feel.
Personally, I like having it there. I’d rather have a tool and not need it than need it and not have it.
For a beginner though, there’s no real need to buy this straight away. Once you’ve used the others for a while, you’ll know yourself if this fills a gap.
You can view the HCT094 here on my Hamlet Tools page.
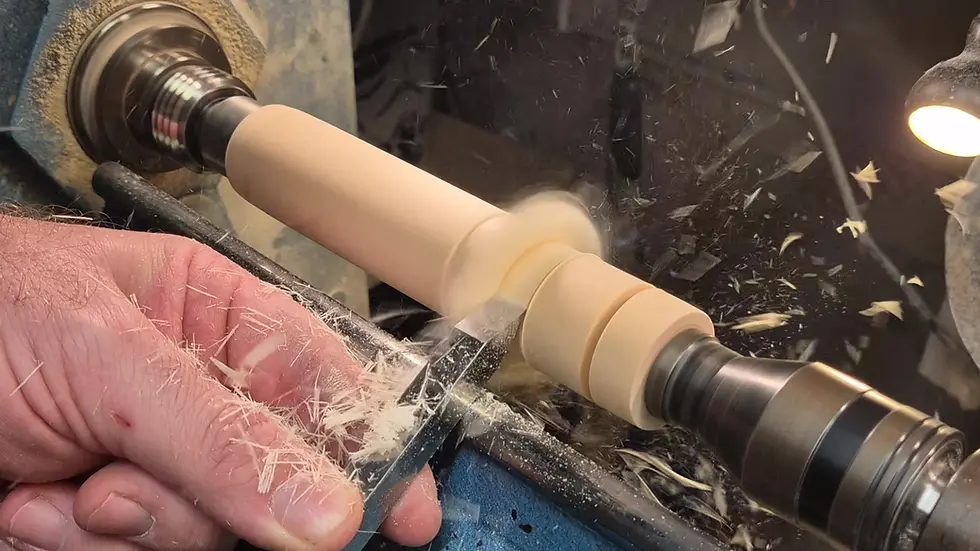
How a Parting Tool Should Cut (This Is Where Many Go Wrong)
This is something I see quite often with new students.
They’re shown to simply push the tool straight into the wood.
That approach does work, but it’s not ideal. It tends to turn the cut into more of a scraping action, where the fibres move across the tip of the tool. Over time, that dulls the edge faster and gives you less control.
Instead, I prefer to teach a bevel-first approach.
Start with the bevel making contact at a fairly steep angle. Then gently draw the tool back until it just begins to cut. From there, lift your back hand slightly and feed the tool forward in a controlled way.
What you’re aiming for is a peeling cut, where the tool is slicing rather than scraping.
When done properly:
● the fibres move back along the bevel
● the cut feels smoother and more controlled
● the edge stays sharper for longer
Most importantly, keep the tool anchored on the toolrest at all times.
Never let the tool climb up onto the wood. As soon as you lose contact with the toolrest, you lose control, and that’s when catches happen.
A Simple Tip to Avoid Fibre Breakout
One thing that catches beginners off guard is how aggressive the initial cut can feel.
When you first enter the wood, it can sometimes burst out fibres either side of the kerf.
A simple way to reduce this is to lightly define the cut first.
Use a skew chisel to make a shallow marking cut on both sides of where the parting tool will go. This helps contain the fibres and gives you a cleaner result.
Just be aware, even with this, the first entry can still feel a bit of a shock until you get used to it.
Why Size Matters More Than You Think
Parting tools aren’t just about cutting a piece off.
The width of the tool affects:
● how much material you remove
● how much heat builds up in the cut
● how likely the tool is to bind
● how clean the final cut will be
A wider tool removes more material but can generate more friction. A narrower tool gives you precision but takes longer.
Having a small range gives you options, and that’s what makes your turning smoother overall.
A Few Practical Tips
No matter which parting tool you’re using:
● Don’t force the cut, let the tool do the work
● Withdraw the tool regularly to clear waste
● Be aware of heat build-up in deeper cuts
● Keep the tool sharp, especially on narrower tools
Sharpening and Keeping Your Parting Tools Clean
Parting tools are probably the worst offenders when it comes to resin build-up.
You’re pushing a tool through a narrow kerf, there’s friction, heat builds up, and before long you’ve got a layer of gunk stuck to the sides of the blade. It’s not just untidy either, it increases friction and makes binding more likely.
The simplest way to deal with it is:
● Carefully scrape it off with a utility knife
● Then use a bit of sandpaper to clean up what’s left
That’s usually enough to get the tool back to where it should be.
If you want to go a step further, products like the Trend enzyme cleaner can help loosen the build-up. You spray it on, leave it for a while, and then scrape it off. It works well, but for most people, a knife and a bit of sandpaper will do the job just fine.
Sharpening Parting Tools (It’s Easier Than You Think)
Parting tools are actually one of the easiest tools to sharpen and maintain once you get past the first grind.
Out of the box, the factory grind is usually quite flat. When you bring that to an 8" grinding wheel, you’ll naturally create a slight concave grind.
That’s perfectly fine.
If you’ve bought your tools from me, I’ll normally set that up for you anyway so you’re starting off right.
After that, don’t overthink it.
You don’t need to grind all the way back along the entire face of the tool. Just focus on:
● the tip
● and roughly the first 5–6mm behind it
That’s the part doing the work.
The rest will take care of itself over time as you repeat sharpen the tool.
A lot of beginners, myself included back in the day, try to make the grind look perfect all the way back. It’s unnecessary, and all you’re doing is wasting steel and wearing down your grinding wheel.
Once you’ve got your platform set to the right angle, it becomes very repeatable. You can even make a simple jig so you hit the same angle every time without thinking about it.
If you’d like to see that in person, it’s something I cover during my tuition sessions here in Tralee.
Final Thoughts
You don’t need every size on the market to get started.
In fact, most people are better off learning how to use one or two well before adding more.
But having the right parting tools, even just a small selection, makes a noticeable difference to how cleanly and confidently you work.
Start simple, get comfortable with them, and then add more if and when you feel the need.
And if you want to browse all of my posts by topic:👉 Woodturning Guides & Articles
Thanks for Reading,
David
──────────── ✿ ────────────
If you’d like to support what I do here, there’s a small “buy me a coffee” option below.
──────────── ✿ ────────────
☕ Buy Me a Coffee?
I used to run ads on my website to generate a small income, but they slowed things down and didn’t fit the feel of what I’m building here. So, I’ve removed them in favor of something simpler and more personal—a “Buy Me a Coffee” button.
If you found this post interesting, helpful, or simply enjoyable, feel free to use the link below to show your support. No pressure at all—but every little bit helps, and it’s always genuinely appreciated. As a small independent maker, I rely on a mix of teaching, crafting, and sharing to keep things going. This is just one way to help keep the shavings flying. Thanks so much!
About the Author
I’m David Condon, a woodturner and small business owner based in Tralee, Co. Kerry. I’ve been working with wood for most of my life at this stage — 11 years as a carpenter and over a decade running my own woodturning business.
Over the years, I’ve learned that woodturning is as much about patience and problem-solving as it is about tools and technique. I work mainly with Irish hardwoods, teach woodturning full-time, and spend most days learning something new in the workshop myself. On this site, I share the same practical knowledge I pass on to my students, shaped by experience, mistakes, and time spent at the lathe. If you’re interested in learning in person, I offer woodturning lessons in Tralee, with details available on my Woodturning Tuition page.
© David Condon Woodcraft – All Rights Reserved.
More Woodturning Pages to Explore
● Hampshire Sheen - Fine Finishing products that will highlight your project pieces
● Hamlet Tools - Fantastic Woodturning Tools from a well trusted brand
● Woodcraft Hub - View my woodcraft creations for inspiration of gift buying.
● Sanding Essentials - Essential sanding products for Woodturners & Woodworkers.
● Woodturning Blanks - A fine range of Hardwood Spindle Blanks & a few Bowl Blanks too!
● Woodturning Pen Blanks - A huge assortment of Acrylic & Irish Hardwood Pen Blanks.
● Crafter's Haven – A vast range of craft supplies for crafters and gift givers!
Original content © David Condon Woodcraft — Written by David Condon. Please credit and link if shared.


Comments